Weekend Project - Installing the Cell Signal Booster - Part 2
Did you read Part 1 of this project?
Since I know all of my tens of blog readers have been waiting with baited breath as to the outcome of this endeavor, I'm happy to announce that we finished up the cell booster installation on Arlene the camper yesterday. Like the last time I blogged about this, here's a fun dog picture, and there's another one at the end to entice you to read the rest of the blog:
Zoe, enjoying a pine cone we brought
back to the girls from our July trip to Flagstaff.
They were both like,
"what is this magic thing?!?!?"
Okay, anywhoo, back to the project. As you might recall from Part 1 of the blog, we'd temporarily set up the cell booster the last time we were in east-butt-fork Mesa, but we hadn't permanently installed it, due to lacking all of the proper equipment.
As is our wont, we were up early on Saturday morning, so after walking the kiddos and enjoying some hot coffee on our back patio (it was a low of 73 degrees! Call the mayor!), we headed out on the road. After a quick stop at Home Depot for stainless steel screws (so they wouldn't rust if they got wet), clear Command hooks (for routing the interior antenna cable across the ceiling of the camper, if needed), air filters, and an extension cord (the latter two items not being required for this project - we just needed them at home), it was out to Mesa. We had dinner plans with friends that evening, so we hit the ground running, since we wanted to make it home with plenty of time to clean up and let the monkeys have some "out of their kennels" time before we shoved them back in for the evening.
Once we unlocked the camper, I headed inside to start more organization and cleaning projects, while Chris fired up the generator to start the AC; he also set up our new telescoping ladder, which will be the one that lives in the camper's storage area, should roof access be needed while we're traveling.
The new ladder.
Ooooh, aaaah.
holding a bunch of cleaning supplies.
He also seems to be trying to tell me something,
but eh, whatever.
It probably wasn't important.
Chris' first step was to clean off the area of the roof where he'd be drilling holes and applying sealant. When we watched a video about this process, the YouTuber in question made use of (in his words) "a good, all-purpose, gentle cleaner" which was the exact blue of standard Windex. We chose Simple Green, and it worked just fine.
Chris: "Can you hand me that towel?
The roof is really hot.
Also, really shiny.
Can I also have my sunglasses?"
After handing him a few things on the roof (and taking pictures, of course), I headed back inside, letting Chris know to knock three times in succession when he needed my help again. I heard all sorts of random bumps and bangs and drill sounds, with only one quick peek inside for him to confirm he hadn't drilled a screw all the way through the roof AND ceiling (thankfully, he had not). Eventually, the exterior antenna was secured to the roof, and the proper self-leveling sealant was applied over the holes.
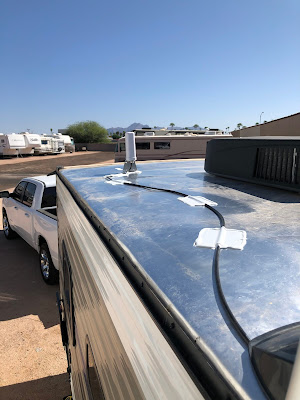
In this picture, you can also see the RV roof tape
applied (using the cute little roller dude)
to hold down the length of coax cable leading to the antenna.
The other end is going down into the camper
via the roof vent for the fridge,
which is the dark box on the right side of the shot.
We don't have pictures of this,
but Chris sealed both the interior and exterior holes
in the roof vent with that puffy, expanding foam stuff.
Back inside, we made sure the coax cable running to the exterior antenna was still transmitting properly when connected to the booster itself, and we bundled it up and shoved it behind the microwave, which Chris re-installed.
Wadding the extra cable behind the microwave
Hooray! We have the green light of happiness!
To avoid drilling yet another set of holes in the camper, we used heavy-duty velcro to secure the booster box bracket to the inside of the cabinet; if it comes detached (unlikely), we could still screw it into the wall as needed. Right now, we've plugged the booster box into the AC power outlet provided for the microwave (we bought an outlet splitter plug, and both items are plugged into that). We do have DC power running through that cabinet to the small light over the sink, and Chris is planning to do some wiring to allow the booster box to run on that as well, but that will take a bit more time (and some texts to the electrical engineers we know - Toni, get ready!). For now, as long as we're plugged into shore power, or we have the generator running, we are good to go!
The booster box, internal antenna, plug splitter thing,
and a whole lot of wires.
We've already picked up some cable clamps/twist ties,
and we'll use those to coil the wires up
a bit more effectively in the future.
So, that's it! Project done - or at least, done enough to be used! Our first real test of the booster will be our upcoming trip to Alamo Lake, at the end of October. Fingers crossed I don't have to drive 45 minutes each way to teach class!
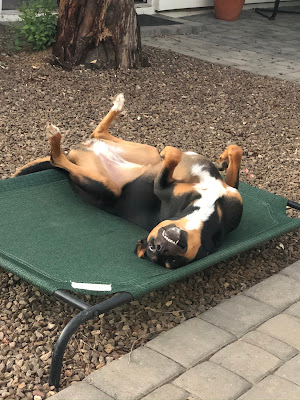
And, as promised, here's Augs:
Later!
Amy


Comments
Post a Comment